Steinberg Cubase is one of the very best music production software designed to handle all purposes or aspects of music production which includes beat making, vocal recording, mixing and mastering. The software can also be used to extract audio sounds from movies; these audios can be mixed and mastered professionally to give the movie a superior sound quality over others. Cubase handles all aspects of audio production which makes it one of the best production software unlike Propeller head Reason and FL Studio. Cubase, Sonar, Pro Tools and Logic can handle all the aspects of music production while others like Reason may not.
In this article, I will teach you step by step how you can be able to make a simple Afro beat with Piano roll without a piano connected to your computer. Some novice producers chose to make their beats in FL Studio and voice them in Cubase because they felt it’s very difficult to make beats in Cubase. But I tell you the truth, Cubase is better than FL Studio which has only one way of making beats. Cubase has about four different ways of making beats which include using piano roll, importing and laying samples which are actually my very best, using groove agent and also recording it from external instruments like the virtual drum set, drum machine, keyboard and so on.
So in making an Afro beat of 4×4 beat styles in piano roll follow these simple steps:
1. Launch Cubase on your system.
2. Allow the template to be on its default “empty” and click ok.
3. Crete you project folder and click ok. If you don’t know how to create a project folder in Cubase then revisit my article on how to create a project folder in cubase.
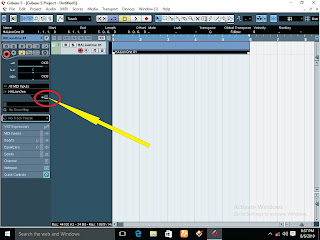
4. In the working environment right click at the left side of the working environment and select “add instrument track”
if you do not understand this step very well please visit my video tutorials on how to make Afro beat without a keyboard and sound sample in Cubase here.https://www.youtube.com/watch?v=Iz-FtO_0d1s&t=96s
5. In the option box select the plug-in you want to play the drum kit from. You may choose either Hypersonic, hyper canvas; halion or any other drum kit plugging you may have on your system. So, for the sake of this article select halion and click ok.
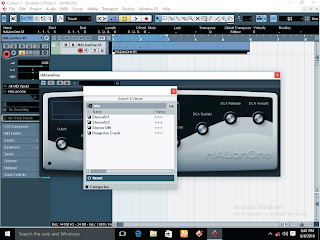
6. At the left side of the working environment just below the insert, there is a small icon that looks like the surface of a console, click on it and halion will display. In the search box located on top inside the halion click there and type stereo GM. The stereo GM will come up.
7. Click on it and click select.
8. On top of the transport area, spread the transport locator feathers from 1 to 3.
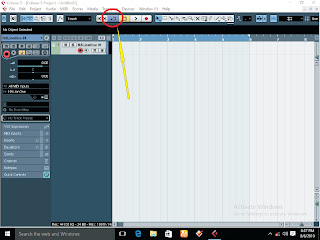
9. Click the transport loop or transport circle ON/OFF tool at the transport bar, its shortcut is slash (/).
10. Double click in the region selected on the channel created earlier and a bar will be created.
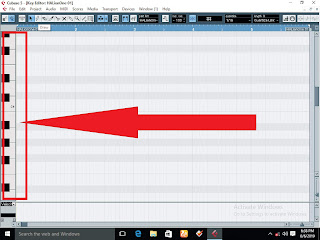
11. Double click on the bar that is created on that channel and the piano roll will open, zoom with H and G respectively.
12. Play with piano keys at the left side of the piano roll to see which sound of the kit you want to record.
13. Click record or press * on your keyboard to record, then use your mouse or pencil tool to play the instrument as desired and it will be recorded.
14. Playback to make adjustments, highlight all (Ctr+A) and press Q on the keyboard to quantize.
To understand all of these steps visit my video tutorial and learn from my YouTube channel here https://www.youtube.com/watch?v=Iz-FtO_0d1s&t=96s and don’t just go away like that, show some love by subscribing to the channel to motivate me to do more of these mind blowing video tutorials for you. 


